Blood Hunt Guide
Core Concept
Hardest mode. You're constantly bleeding out. Kill Bosses to heal. Survive four phases. Extract alive.
Phase 1: Preparation (180s, 1%/sec drain)
- Lowest pressure — use it wisely
- Kill early Bosses for health + fortification items
- Loot crates → upgrade gear
- Pre-deploy covers at key spots
- Memorize the map and spawn points
Phase 2: Bounty (180s, 1.5%/sec)
- Bounty list generated — all surviving Bosses marked
- Read the Bounty Radar's direction arrow, distance, and
x mark count; when the gold LEADER marker appears, decide quickly whether you can take that high-value fight - Bounty kills heal 45%–60% of entry max HP (vs 30% for regular kills) + extra drops
- Bosses kill each other and inherit marks — track the Bounty Leader
- Marks accumulated = extraction reward count
Phase 3: Hunt Surge (180s, 2%/sec)
- All Bosses hunt you actively
- Unmarked Bosses gain +50% speed
- Most dangerous phase — kill fast or die
- Fortifications are essential — create firing positions
- Never stop moving
Phase 4: Extraction (unlimited, 3%/sec)
- Extraction point spawns far away
- All Bosses +50% speed, unmarked +100%
- Don't fight — run for extraction
- Stand on the point for 15 seconds to extract
- Deploy fortifications to defend yourself
Fortification Strategy
- Covers — Deploy liberally (most common drop)
- Roadblocks — Key chokepoints + extraction point (500 HP, very durable)
- Barbed Wire — On approach routes to slow Bosses
- Repair Spray — Extend fortification lifespan
Extraction Defense
- Reach the point → immediately deploy Roadblocks on main approaches
- Barbed Wire to slow incoming Bosses
- Covers to fill gaps
- Repair Spray on damaged fortifications
- Hold 15 seconds. That's all
Bounty Strategy
- More marks = richer extraction rewards
- But more marks = more combat risk
- Getting out alive > a few extra marks
- High-mark kills improve healing and max-health growth, but run-only health growth stops at 150% of entry max HP
Bloodfire Overload
- Once max-health growth reaches its cap, further growth charges Bloodfire; bubbles and phase broadcasts show progress
- Full charge starts a 15-second burst with +40% gun/melee damage and +15% speed, but also doubles bleed and applies Burn
- Prioritize Bounty Bosses during Overload: each kill adds 3 seconds, up to 24 seconds remaining
- Keep moving while Overloaded. Burn and doubled bleed make stationary damage trading a losing play
- A completed Overload leaves 25 charge; do not force another cycle while already low on health
Recommended Gear
- High DPS weapons — Fast kills = sustain
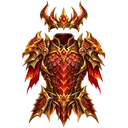 Dragon King Set — Dash + fire immunity
- Cloud Rider — Fly to extraction fast
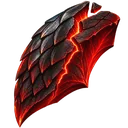 Reverse Scale — Last-resort save
- Max ammo — Buy from Mystery Merchant
Categories: